

Knitting & Crochet How-Tos


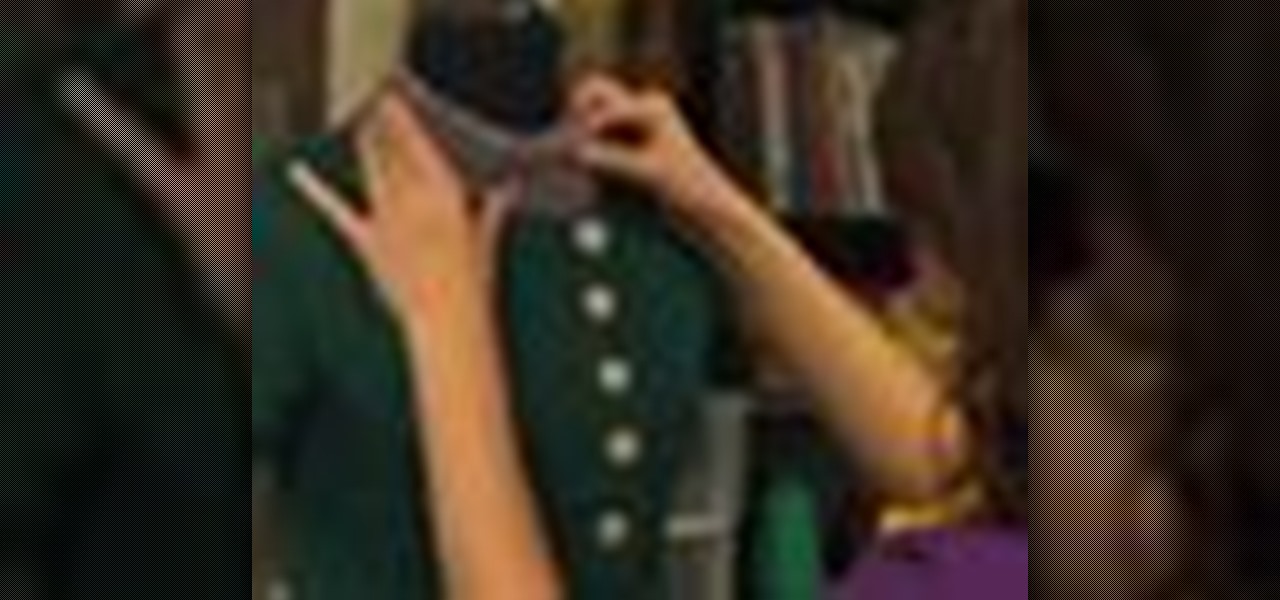


How To: Knit a Moroccan style scarf with Diva Dan
You will need two different colors of complimentary yarn to take full advantage of this lovely pattern! You should also be prepared to cast between 90 to 105 stitches to start, and you can end with a lovely and elegent Moroccan scarf.
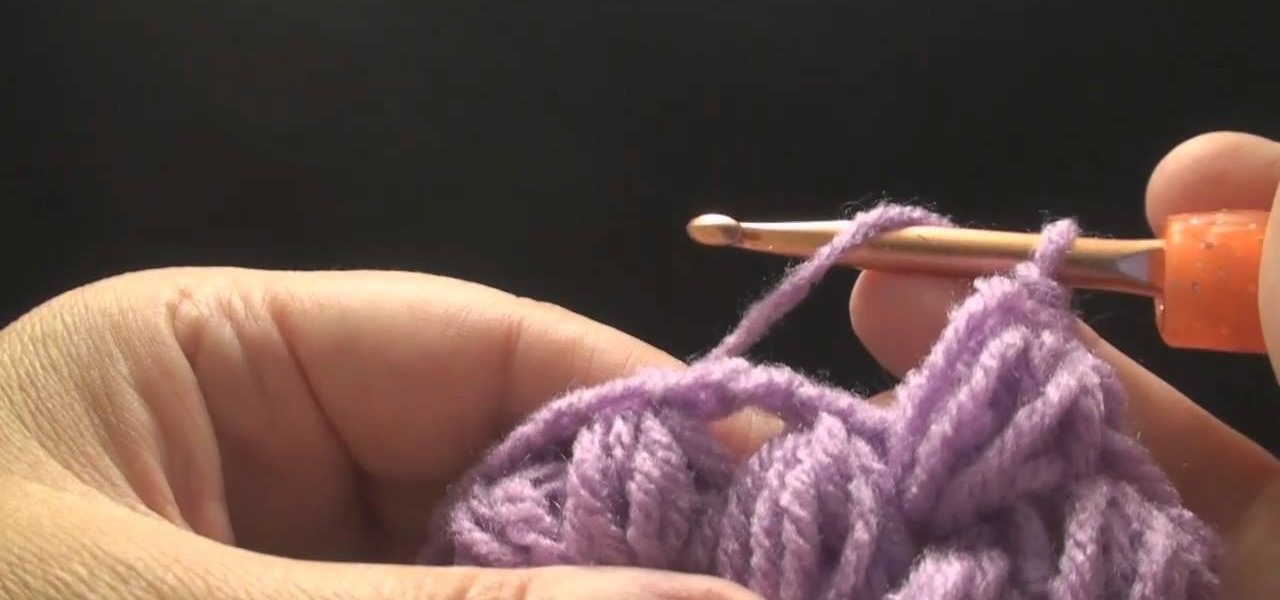
How To: Master the art of proper tension when you crochet
This video tutorial is useful for anyone who has questions about improving their crochet technique. You'll be shown how to use the right tension to work your chain stitches evenly, and also how to troubleshoot common problems in your crochet projects.
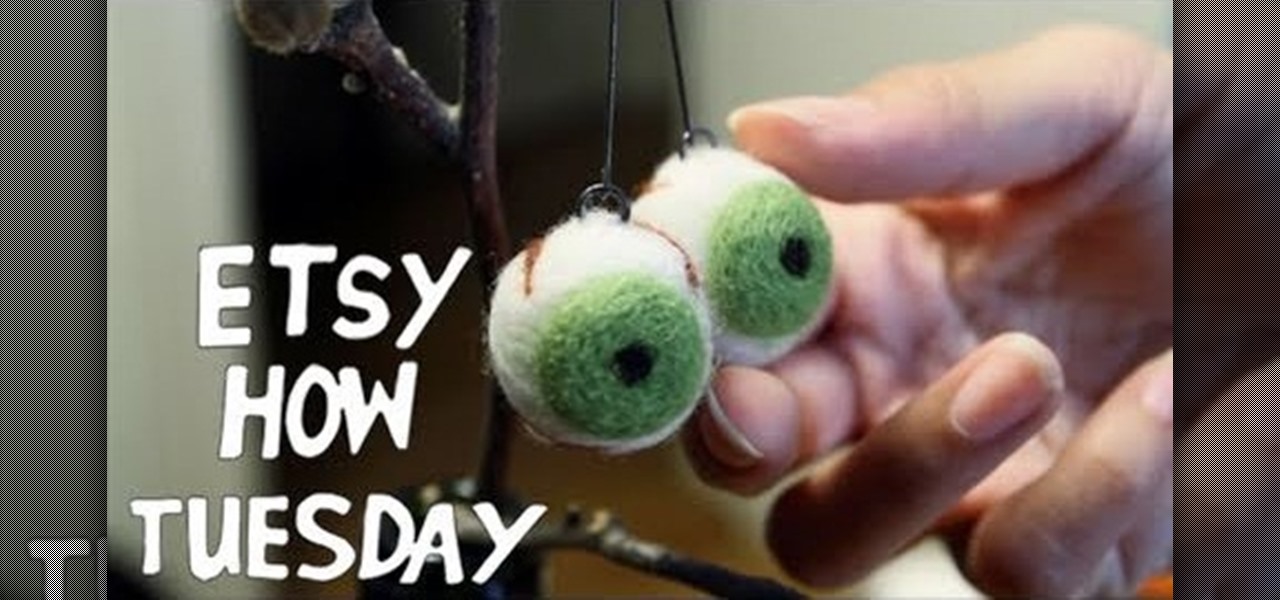
How To: Needle felt eyeballs out of wool and foam
This makes the perfect creepy decoration for Halloween! You can felt a few scraps of wool and use that to make some really awesome and creepy eyeballs. In addition to the wool, you'll also need some special felting needles and craft foam.

How To: Knit the Purl Stitch
There are two basic stitches in knitting. One is the Knit Stitch. The other is the Purl Stitch. All knitting patterns are based on these stitches, so you'll want to know how to do both of them. The Knit side of your work is generally called the Front or Right side, whereas the Purl side is generally called the Back or Wrong side. This is important to remember when you're following a pattern.
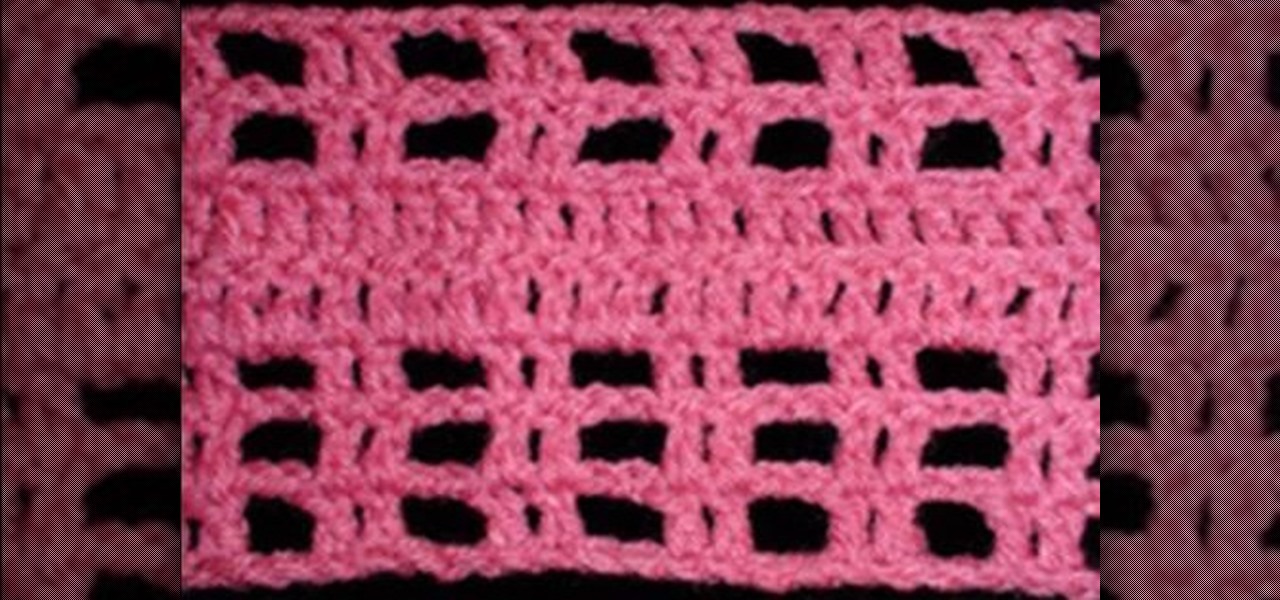
How To: Perfect the Every Which Way crochet stitch
This stitch, called Every Which Way, can be used for sweaters, scarves, afghans or just as an embellishment for your project. This is about an intermediate stitch, so make sure you have some experience with crochet before attempting this for yourself.
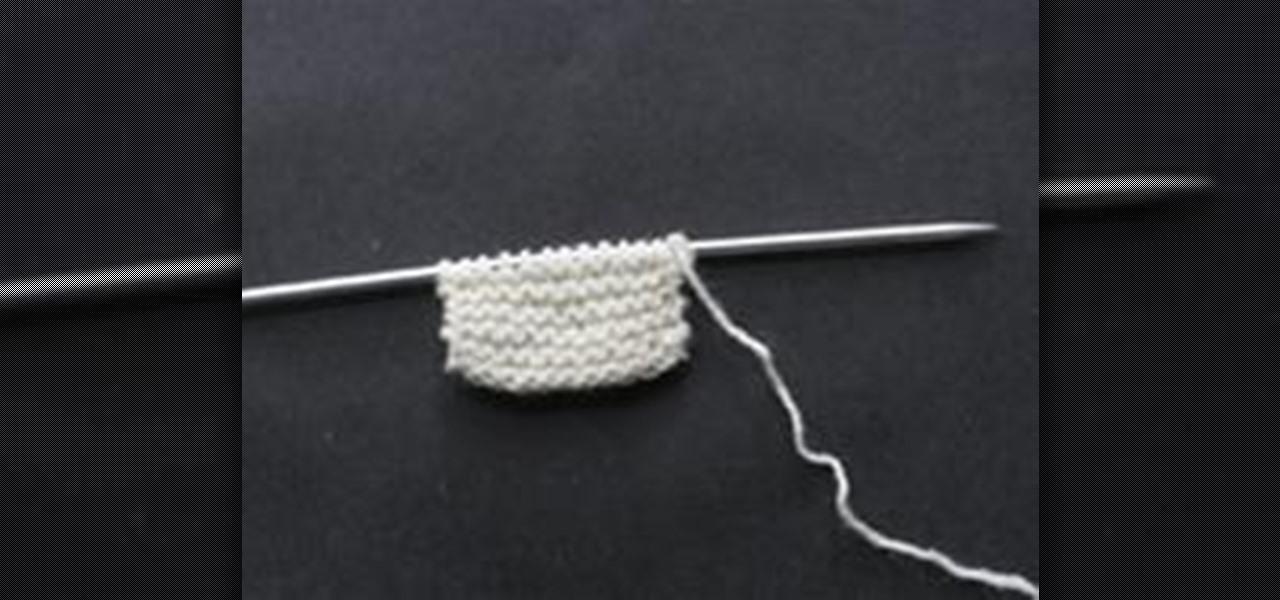
How To: Knit the Garter Stitch
There are two basic stitches in knitting. One is the KNIT STITCH, the other is the PURL STITCH. The GARTER STITCH itself is quite simple. You knit every stitch on every row of your knitting. It's the first stitch one learns in knitting. It's the easiest of all the knitting stitches and one that you can use for many projects. It's an especially good stitch for knitting something when you want both sides of the work to look the same.

How To: Knit the Knit Stitch
Once you have learned to Cast On, you will need to learn the Knit Stitch. Once you have learned the Knit Stitch, you will be able to start a project!

How To: Understand the Differences Between Knitting Needles
There are different kinds of knitting needles to choose from for different projects. You will find wooden, plastic or aluminum in different lengths and shapes. There are straight, circular or double pointed.
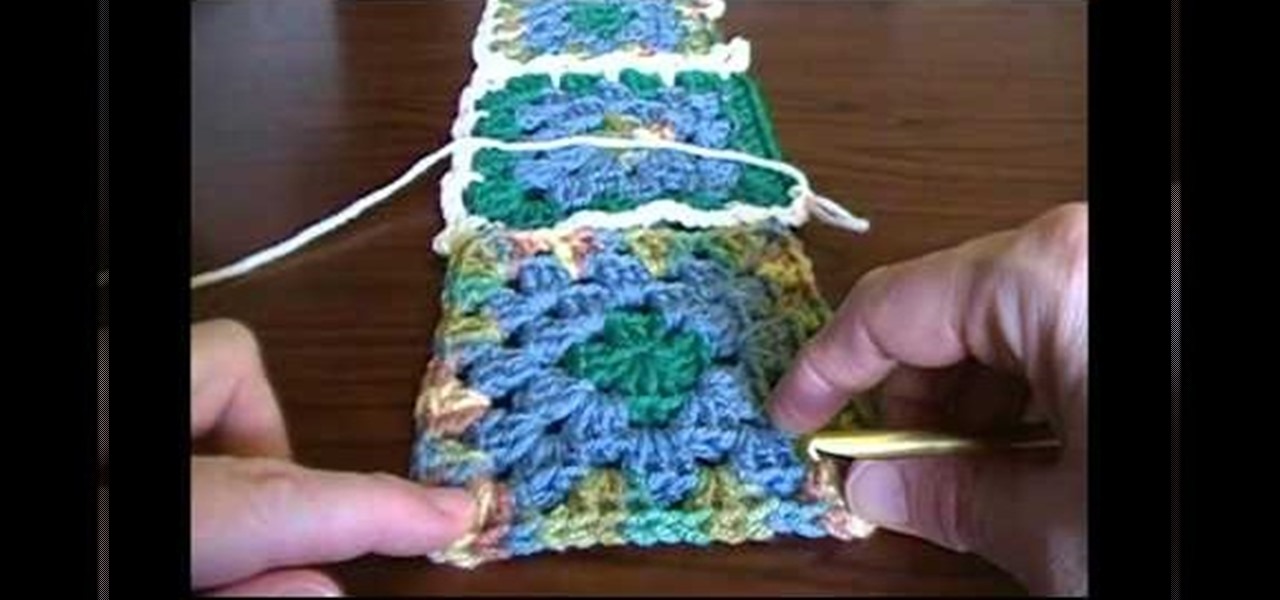
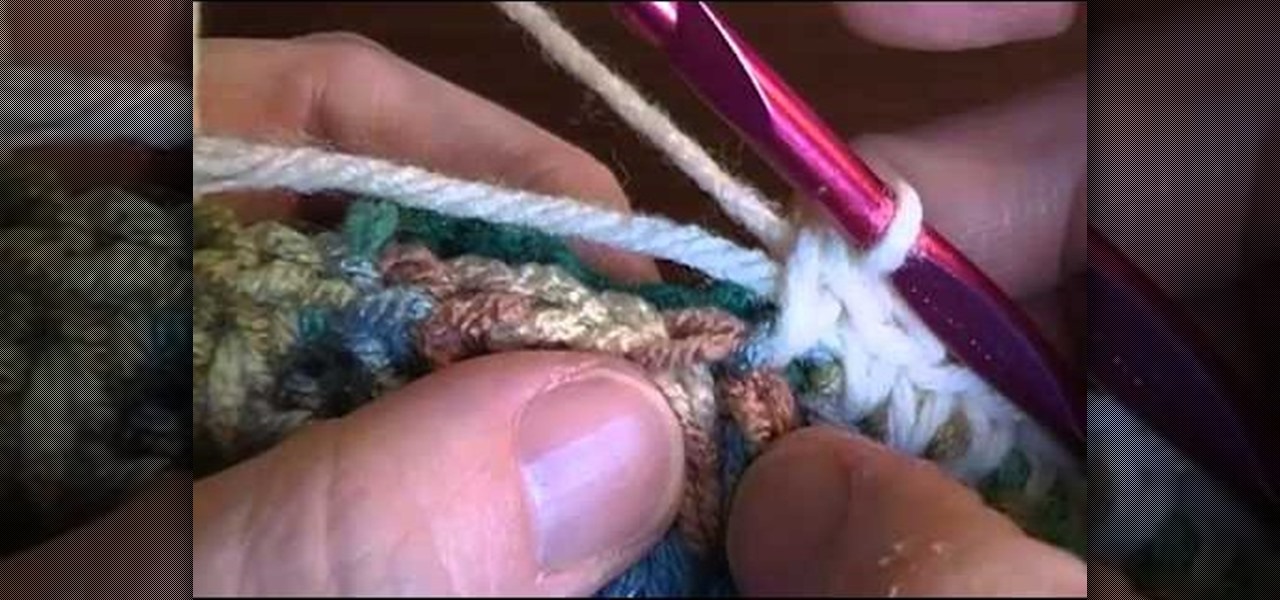
How To: Join crocheted granny squares using a five chain flat braid method
This tutorial is aimed at those who have at least some moderate experience with crochet. Here, you'll learn how to join two granny squares together using a five chain, flat braid continuous join method that will make your project lay flat all the way around.

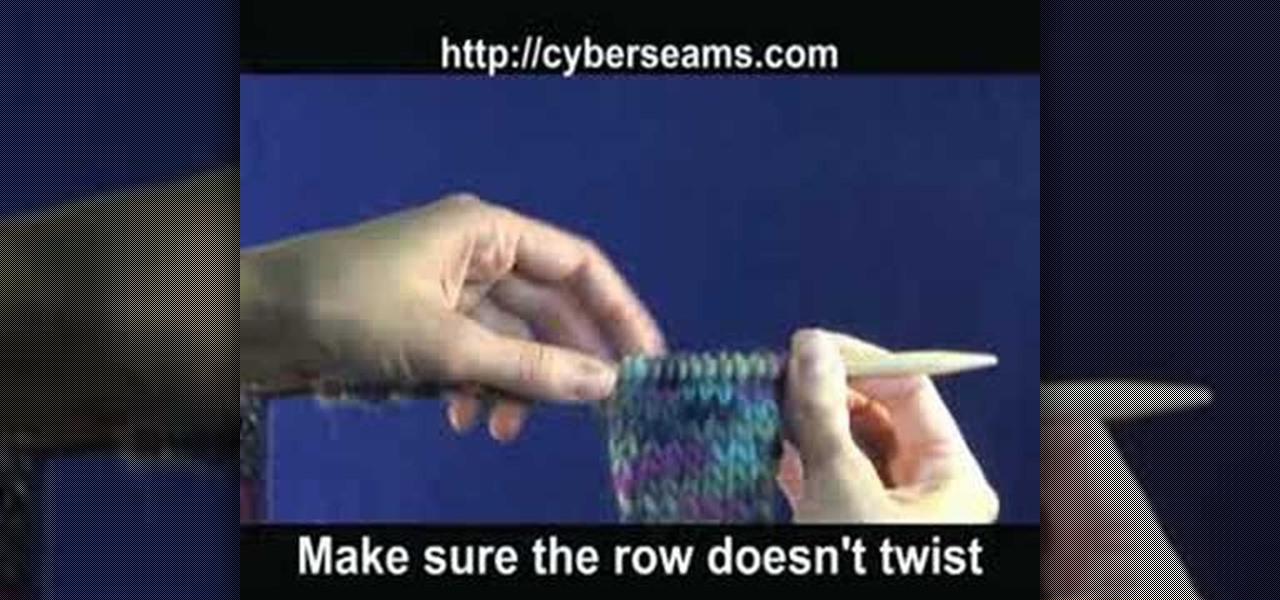
How To: Do the Two Needle Cast On Knitting
There are so many different ways to cast on knitting. I have my own favorite. It's the way I learned when I first started knitting. My way is called TWO NEEDLE CAST ON. I like this 2 needle method because you don't have to guess how much you need to measure out a length of yarn at the beginning. I also think it makes a tighter and straighter edge.
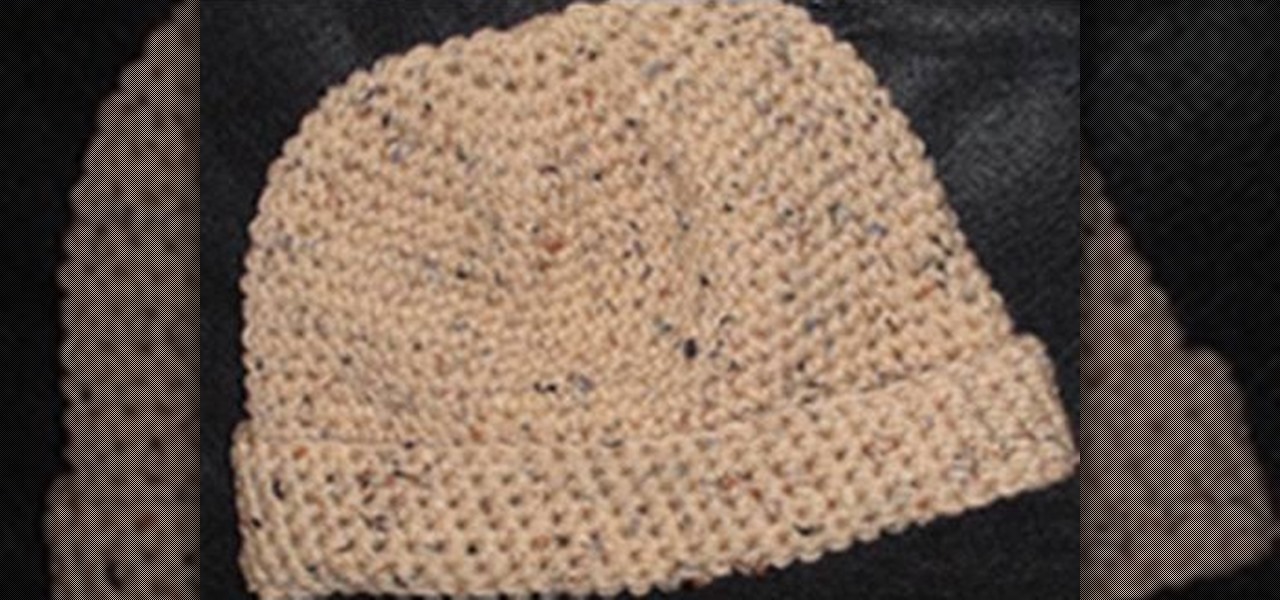
How To: Crochet a left handed large size beanie cap for a man
In this tutorial, we learn how to crochet a left handed large size beanie cap for a man. For the first round, you will work 10 single crochets through the loop, not joining. Then the cap will be worked into a spiral or round shape. Next, you will work in two single crochets in each single crochet. Then, you will do 20 single crochets total. For round three, you will work one single crochet for 20 more total. For round four, you will do the same for fourty more single crochets. For round five ...

How To: Learn knitting basics
In this tutorial, we learn knitting basics. To knit, you will start out by selecting your choice and colors of yarns. After this, you will need to grab two knitting needles and then make a slipknot from the yarn with your finger. Attach this to one of the needles and then start a chain one on this. From here, you will continue to wrap the thread around the needle and then squish it all together. Then, take the other needle and wrap it into the first part of the thread. Then, continue to work ...
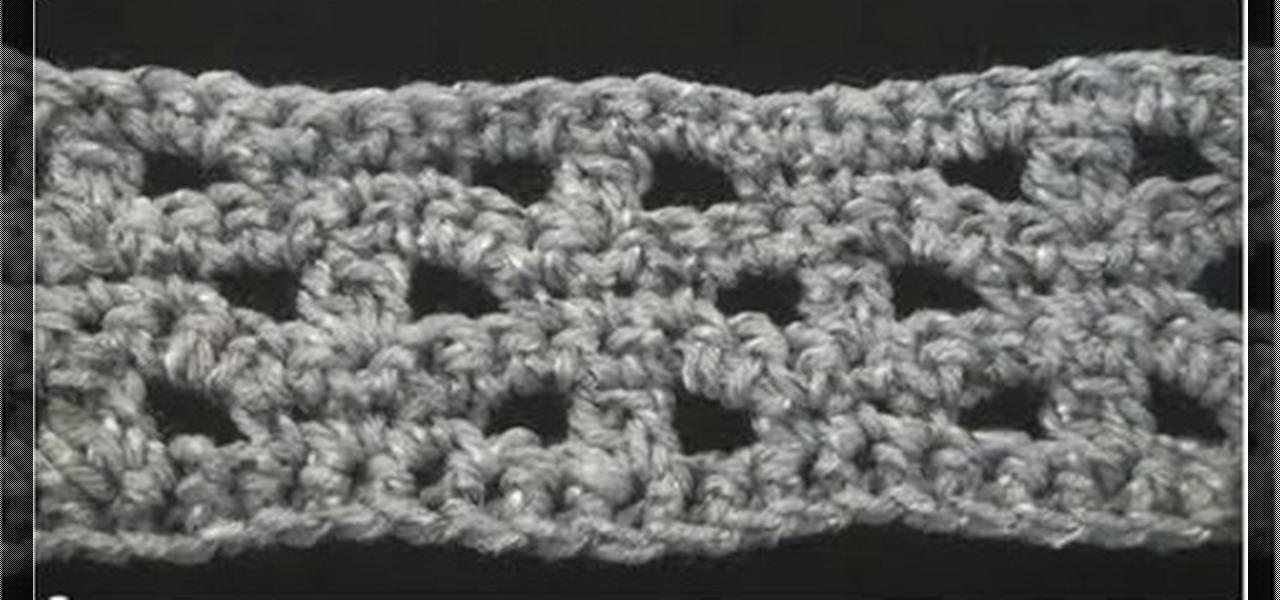
How To: Do a left handed mesh crochet pattern stitch
Are you looking for a new way to crochet while being left handed? Then watch this video, where we learn how to do a left handed mesh crochet pattern stitch. Start off with the first round, where you will double crochet in the fourth chain from the hook. Then, double crochet in the next chain and skip two chains. From here, you will do one double crochet in the next two chains and continue across from the start for the width, ending with two double crochets. For the next and last round, you wi...
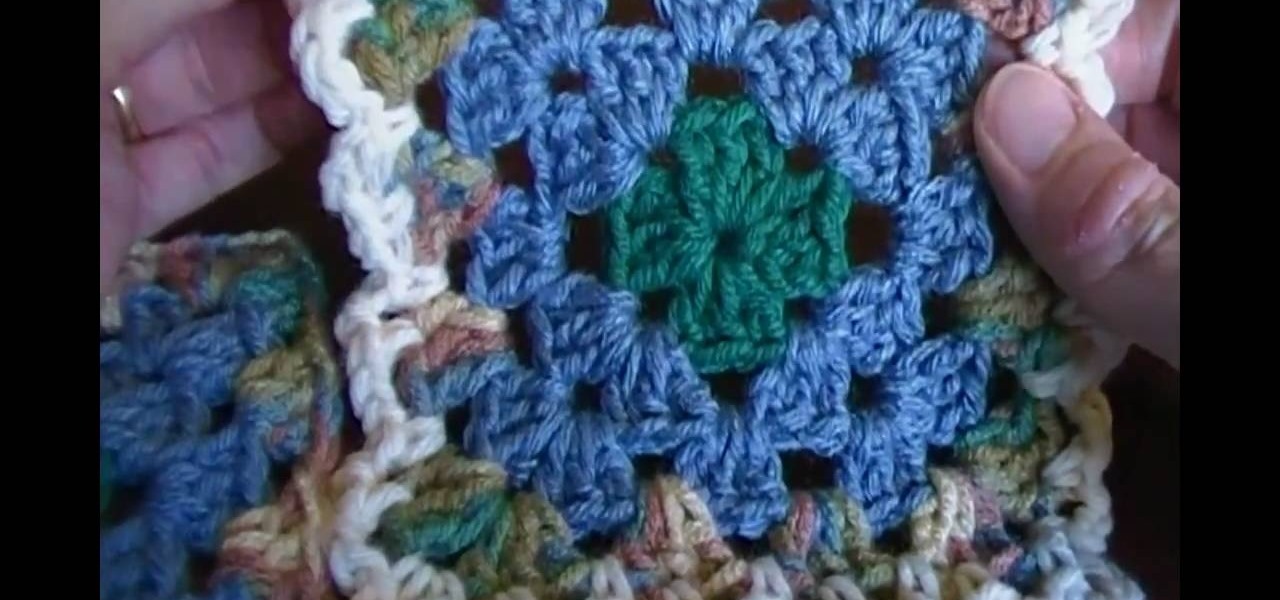
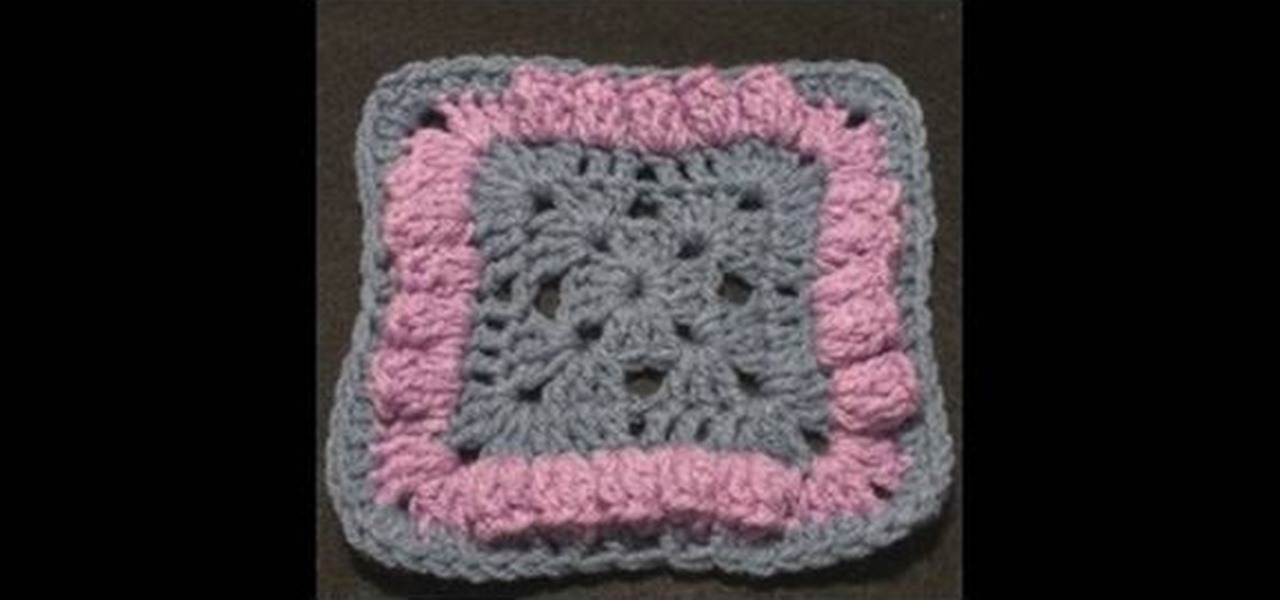
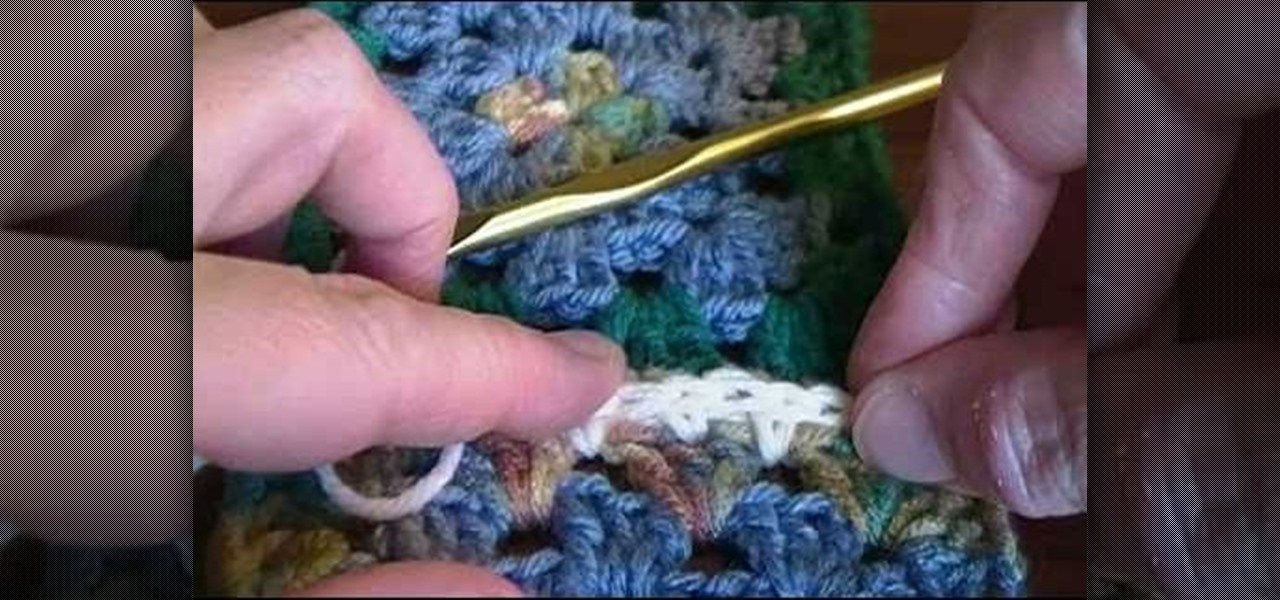
How To: Join crocheted granny squares using the flat braid joining method
The flat braid join is a method of stitching granny squares together using chain-3 loops. This tutorial demonstrates how you can use the flat braid technique to easily and quickly join your own granny squares together for your next crochet project.
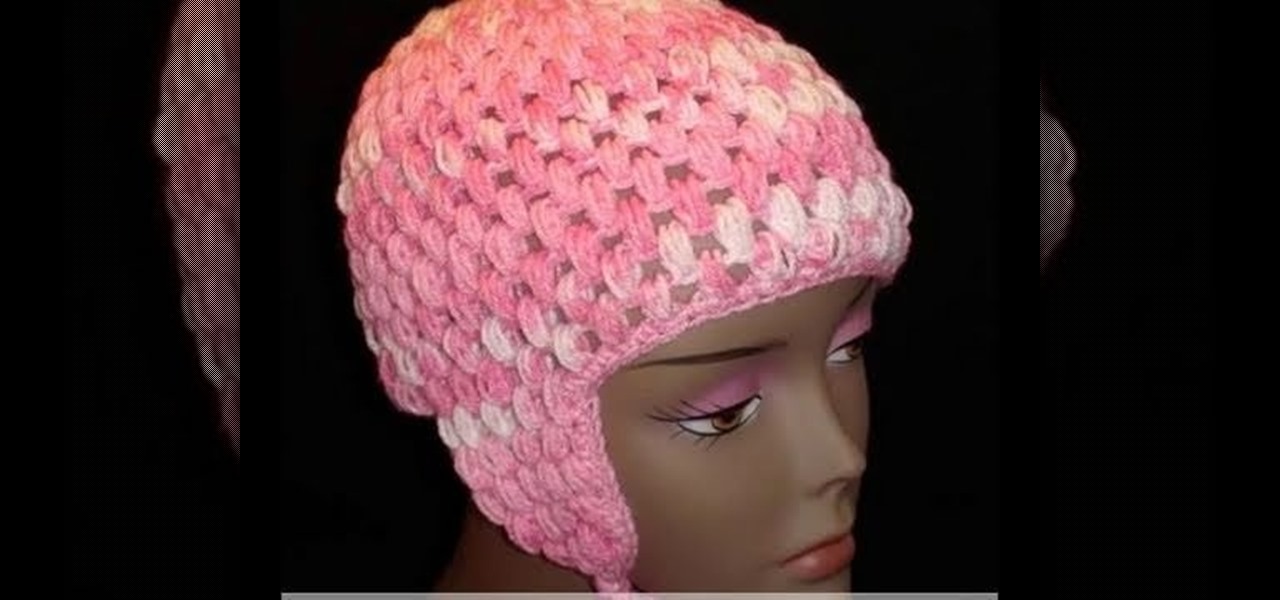
How To: Crochet a cap with ear flaps using the puff stitch
Want to make your own hat now that winter is coming up? Or crochet one as a gift for a friend or loved one? This tutorial shows you how to crochet a fun cap, complete with ear flaps, using the puff stitch.

How To: Crochet a baby hat for left handed crocheters
This tutorial is aimed primarily at those who crochet and are left hand dominant. Learn how to make a cute little baby hat using the puff stitch! It will even have an adorable little yarn bobble at the top. All you need is some yarn and a crochet hook!
How To: Crochet a super fast 3 color granny square
In this tutorial, we learn how to crochet a super fast 3 color granny square. Start out with your first color on the crochet needle. Then, chain four and put the needle back into the first chain. Before you pull everything tight together, you will move your middle finger into the stitch with your thumb so when you pull it will wrap around your fingers. Then, chain three and do this over twice more to create the outlining area around the hole. From here, you will use two other colors using the...
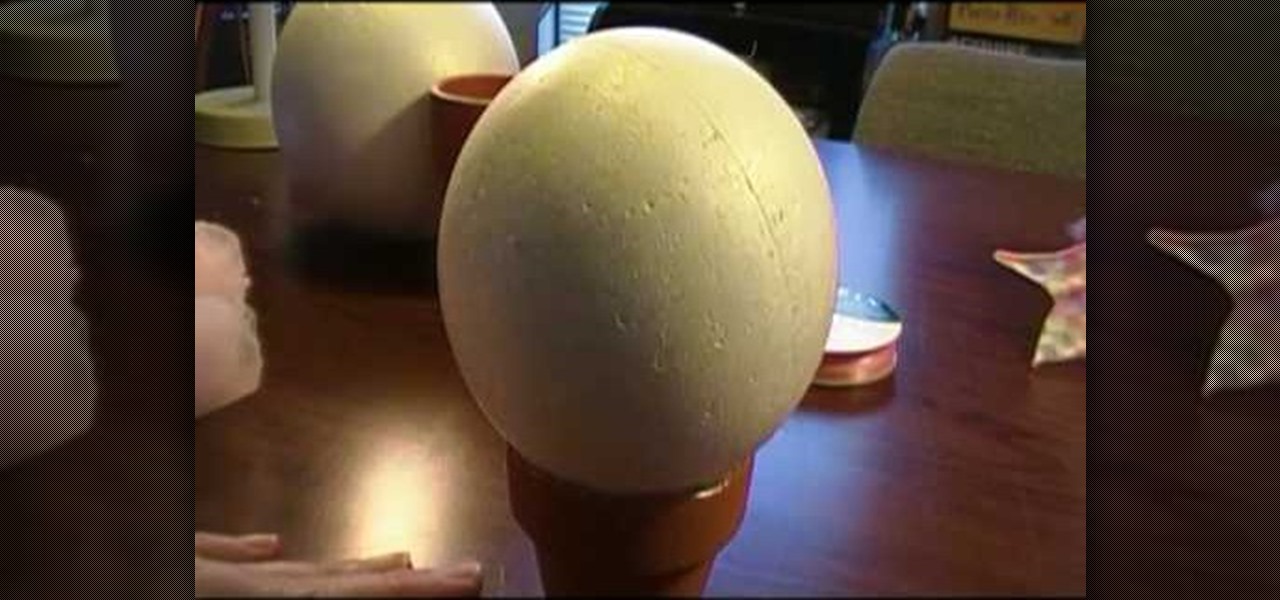
How To: Make a baby and child hat stand
In this video we learn how to make a baby and child hat stand. First, you will need to purchase flower pots from the store along with Styrofoam balls. Use different sizes of balls to fit the size of hats that you are creating. Use marbles to weigh down the flower pots. From here, you will use a hot glue gun to glue the ball to the stand and then let it cool From here, you will be able to use this as a stand for your hat. This will help your hat set after you are done decorating it and display...

How To: Crochet a shell beanie hat
In this video we learn how to crochet a shell beanie hat. There are a total for seventeen rounds to make this beanie hat. Start out with a chain one and then single crochet in the starting loop. Continue to do this throughout the round and then join in the beginning single crochet. For the next round, you will single crochet and then create shells in the hat. Start out with round three, where you will start with a double crochet and then join the half double crochets with the beginning. When ...

How To: Crochet a left handed magic heart potholder
In this tutorial, we learn how to crochet a left handed magic heart potholder. This will only take you a total of around seven rounds to finish from the beginning. Start out with a chain one and then do six half double crochets in the loop and join. For round two, you will do a chain one and then two half double crochets between each previous half double crochet before joining. Round two will be 12 half double crochets in total. For round three, you will chain one and then do two half double ...
How To: Crochet a left handed bellevue granny square
In this video we learn how to crochet a left handed Bellevue granny square. Start out with a popcorn stitch with five double crochets in the same space. Work a slip stitch with the first stitch and then join. After this, chain one and then do three double crochets four times from the first crochet. Next, do one chain one and then three double crochets in the same chain. For the next round you will chain one and then do three double crochets in the same chain. Double crochets for the next thre...

How To: Tie off the end of your crochet project so it does not unravel
You've finished your very first crochet project! Congratulations! But now how do you tie off the yarn in such a way as to keep the whole thing from unraveling? This video demonstrates a simple and easy technique to finish your project and keep it together.

How To: Join two crocheted granny squares together using the whip stich
So you have made two granny squares out of crochet yarn, and now you want to join them together to make a blanket, coverlet or other project. There are several methods to connect them, and this video shows you how to use the whipstitch technique.
How To: Join two granny squares together using a single crochet stitch
The single stitch is a very simple stitch, easy for beginners to master, which can be used to join two granny squares together. This is a useful technique for joining any two crochet pieces together of any size or shape, not just granny squares!
How To: Crochet your granny squares together using the flat single stitch
This short crochet tutorial shows you a variation on the simple single stitch. If you want your project to have a relatively even surface, you can use the flat single stitch as taught in this video to join your granny squares together.

How To: Crochet a cute little baby puff stitch hat
You can crochet the perfect gift for a friend or family member expecting a child. This tutorial shows you how to crochet a cute little baby hat out of pink and white yarn using the puff stitch. It even has an adorable little bobble at the top!

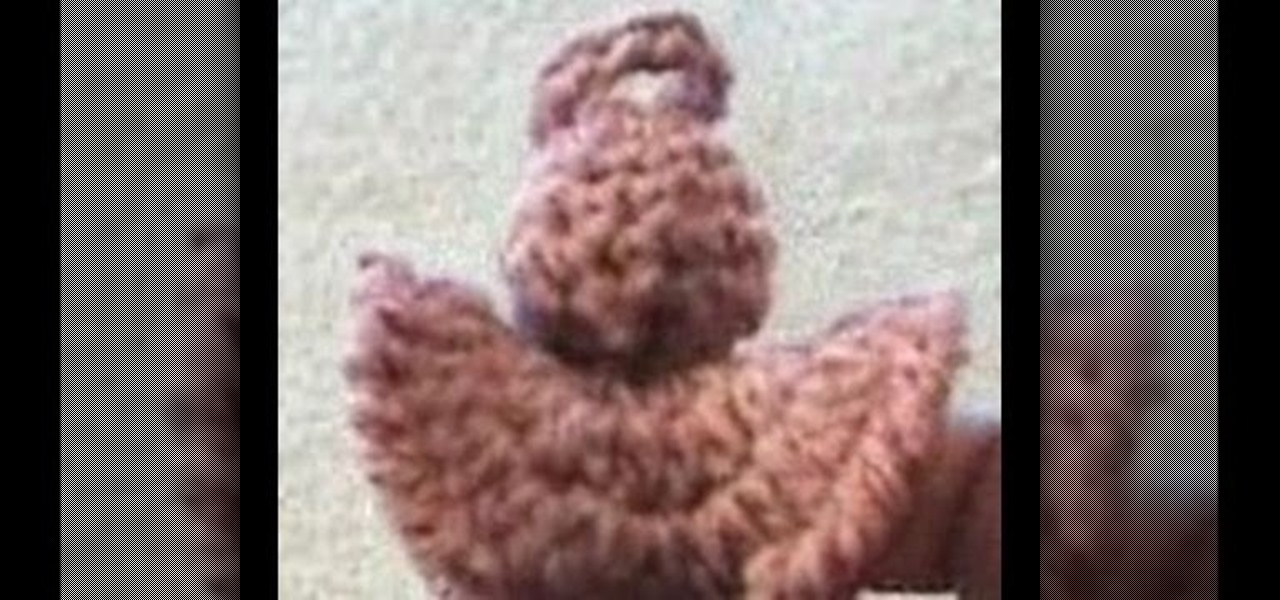
How To: Crochet a small ladybug out of red and black yarn
A perfect gift for any ladybug lover on your gift list this holiday season! Make an easy and simple ladybug - all you need is four-ply yarn in two different colors (nominally red and black, but you can use any color you want) and a size eight crochet needle. Then follow along to get your own ladybug!
How To: Crochet a puff stitch decrease to make yarn puffs
Puff stitches are soft and pretty crochet puffs of yarn, which you can add as an embellishment to scarves, mittens, hats or anything else you want to add a bit of puff to. This tutorial shows you how to do the decrease, or finish off your puff stitch.

How To: Turn a ball point pen into a styler pen for your Knifty Knitter
A styler pen lets you thread yarn through your Knifty Knitter tool much looser than if you had done it by hand. They're not sold in stores, but you can make your own by taking apart a properly sized ball point pen!
How To: Knit a seed stitch texture stitch, also called a British or Irish moss stitch
Knitting and purling are two of the most important parts of crochet, and once your get them down you should be able to do the texture stitch in this video, called alternatively a seed, British, or Irish moss stitch. Watch the video for instructions.

How To: Convert a Pattern for Crochet into a Knitting Pattern
Crocheting and knitting are similar but different enough that the same patterns will not work for both. If you've found a crochet pattern you like and would rather knit it, watch this video to learn how to convert your pattern into the kind you want.
How To: Use the I-cord bind off technique
In this tutorial, we learn how to use the I-cord bind off technique. First, you will need to cast on three additional stitches using the cable cast on. Once you have these cast on, you are going to knit two and then knit two together through the back loop. Then, take your three stitches from the right needle and put them back onto the left needle. Then, knit two, then knit two together through the back loop. Slide the stitches back onto the left needle and that's all you have to do. Repeat th...

How To: Left-hand crochet a wide headband
In this tutorial, we learn how to make a left handed crochet wide headband. First, make a slip knot on the crochet hook and then make a chain of two. Next, wrap the yarn over and pull through once. Repeat this and then wrap the yarn over the hook, then wrap over and pull through once. Repeat this fourteen times to make the entire foundation for your headband. Once you have made this, you will need to repeat this on top of the first foundation several times until you have made several rows so ...

How To: Knit a scarf for an American Girl doll
In this tutorial, we learn how to knit a scarf for an American Girl doll. First, make a slip knot on one knitting needle. Next, case on the stitches. You may do this as many times as you want to create a thicker scarf. Do this by grabbing the loose yarn, wrapping it around your finger and needling through it once. Then, pull one on your finger and then up and over the needle. Repeat casting on the stitches as much as you need to. Do this for each of the stitches, then when you are finished ti...
How To: Attach the strap to a knitted felt tote bag
In this tutorial, we learn how to attach the strap to a knitted felt tote bag. Using a knitted cast on, cast on 35 stitches to where you want the strap to be. After this, use a crochet or knitting needle to pick up working yarn through the sts. Continue to work on your strap until you have reached the desired length that you would like it to be. Once you are finished with the last row, you will need to cast on four more stitches to finish it off. Tie it off at the end, then you will have a st...
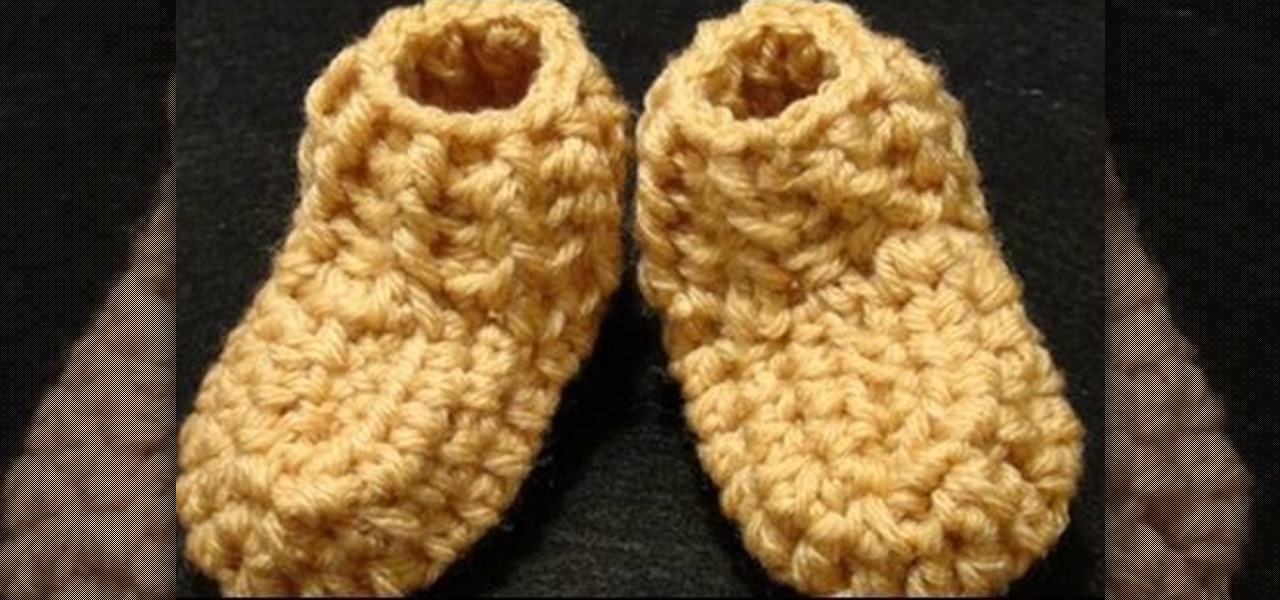
How To: Crochet a rib cuff baby bootie
In this tutorial, we learn how to crochet a rib cuff baby bootie. Start off by creating 8 foundation half double crochets. After this, work 4 half double crochets in the bottom of the last stitch that was completed. Then, work a half double crochet in each of the next 6 stitches. Work 4 half double crochets in the last stitch, then join with the beginning stitch. This will give you 22 half double crochets total. Next, chain 1 and work 2 half double crochets in the same stitch. Then, work 1 ha...

How To: Crochet a fringe on a scarf
In this tutorial, we learn how to crochet a fringe on a scarf. Start be going to the end of your last row with your hook. Then, chain one and pull it tight. Next, decide how long you want your fringes to be and pull your thread that long. After this, cut it on the bottom and pull the loop out of the chain. Now, take your hook under the first stitch and fold three twelve inch strands in half. Then, hook these onto the crochet hook and catch the tail with the strands. Continue to crochet the fr...

How To: Perform a simple crochet
In this tutorial, we learn how to perform a simple crochet. Using the double crochet and single crochet opposite to each other gets rid of the same look when you are creating a pattern. The concept is simple and can make a big difference in your creation. First, take your size K hook, then wrap the yarn around your finger. Go back and forward, then push up and you will have knotted your hook with the yarn. Now, chain one and then two, then chain one and two again. Continue to do this until yo...
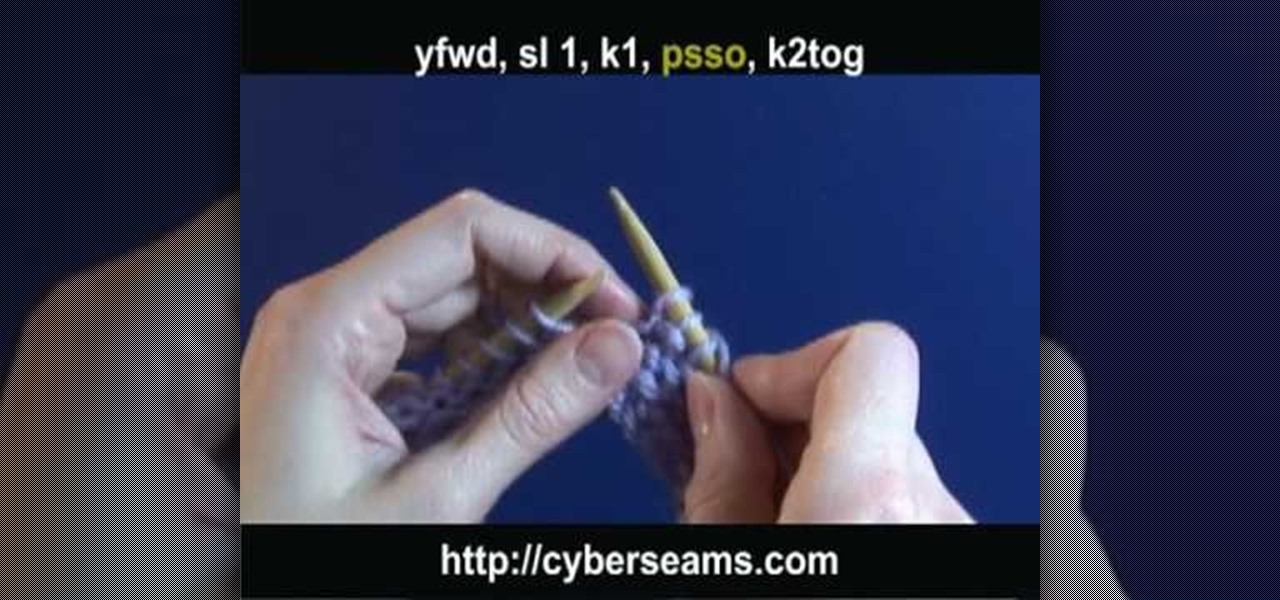
How To: Identify common knitting abbreviations
In this tutorial, we learn how to identify common knitting abbreviations. A yfwd is also known as a yarn forward. An sl 1 is also known as a slip 1 and a k1 is also known as a knit 1. A psso is a pass slipped stitch over and a k2tog is known as a knit 2 together. These are common abbreviations in knitting patterns, when you learn these you will be able to knit more quickly when you are reading a pattern that is written on text. After this, you can make any creation you want and read the direc...
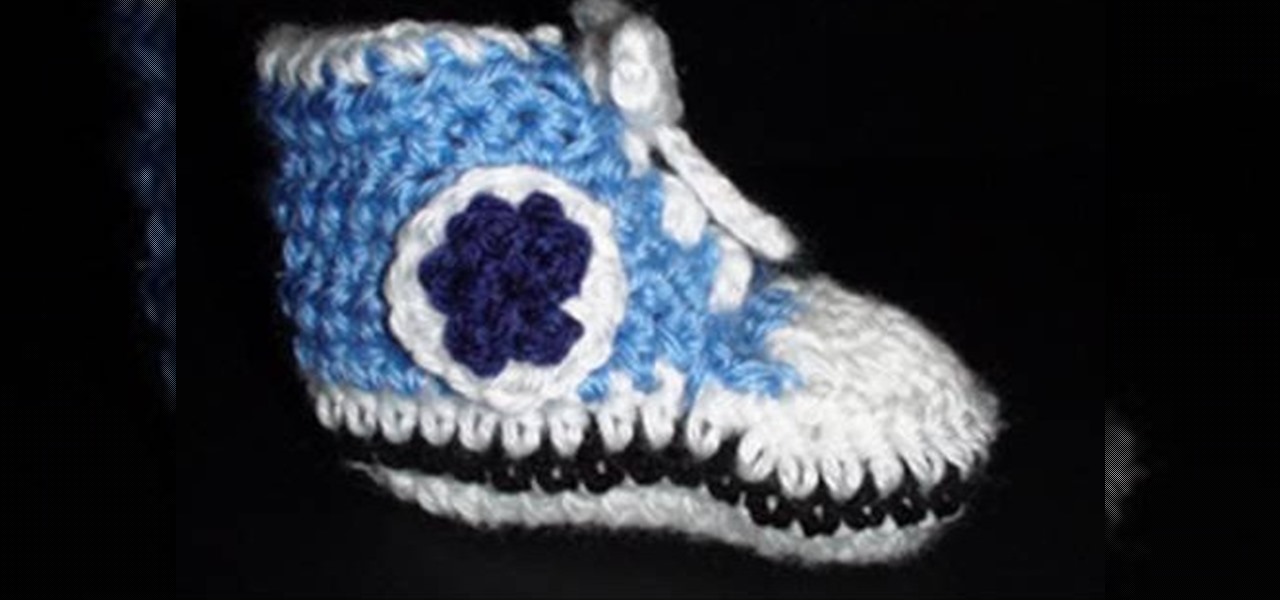
How To: Crochet a left handed baby high top bootie
In this tutorial, we learn how to crochet a left handed baby high top bootie. Throughout this design, you will be doing several different rounds for the sole, front of the bootie, and the rest of the sections. You will use a 10 foundation half double crochet in the sole of the bootie, followed by several more rounds. For the top of the toe, you will start with a magic circle then work in 8 half double crochets and pull shut, working two more half double crochets. Continue to finish the rounds...